
#
IaaS Quickstart Guide
This guide walks through the exact sequence of purchases needed to go from an empty Phoeniqs Portal account to a running workload on Phoeniqs Cloud. For the concepts behind each step, see How Phoeniqs Cloud Works.
#
Prerequisites
- An active Phoeniqs Portal account with a company profile and admin/purchasing privileges. If you don't have one yet, see Create an Account and Buy a Subscription for the general account and checkout flow.
- A decision on how much CPU, RAM, storage, and (optionally) GPU your workload needs. See Resource Pricing for rates and minimums.
#
Purchase Order
Infrastructure Services must be purchased in a fixed, dependency-based order. Each item below can only be created once the one before it exists in the portal.
1. Resource Group (create) → 2. Capacity Pool → 3. Compute/Memory/Storage/GPU → 4. Namespace or Hosted Cluster
All subscriptions are purchased from Products → Infrastructure Services, not from within a Resource Group or Capacity Pool. At checkout, select the Resource Group you created in Step 1.
#
Step 1: Create a Resource Group
Sign in to the Phoeniqs Portal.
Go to Resource Groups.
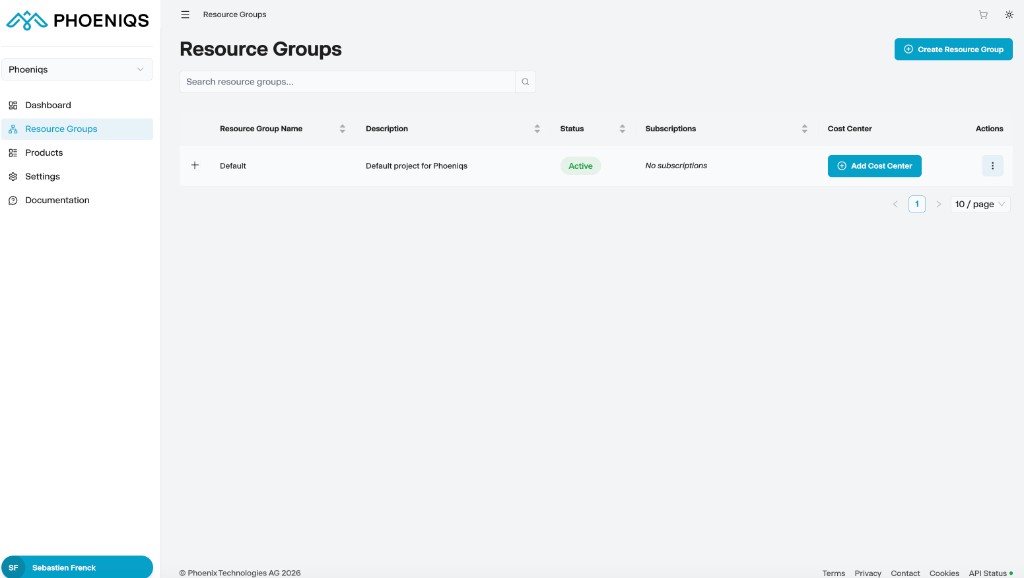
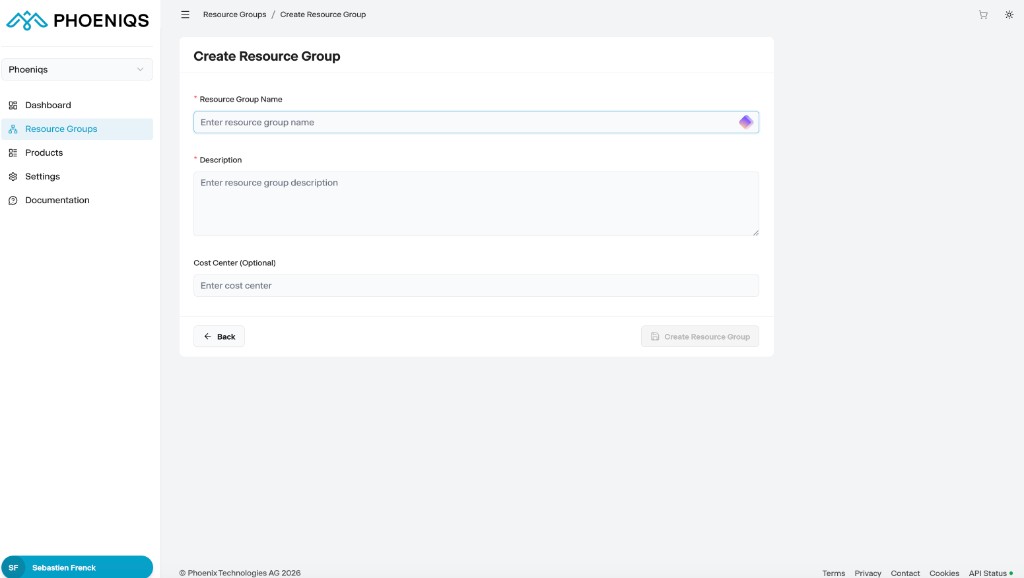
Click Create Resource Group and give it a name (for example, per department, project, or environment).
Resource Groups are free and exist purely to organize everything else you purchase.
#
Step 2: Add a Capacity Pool
Go to Products and select Infrastructure Services.
Click Add on the Capacity Pool tile.
Proceed to checkout, select the Resource Group you created in Step 1, agree to the terms, and click Buy subscription.
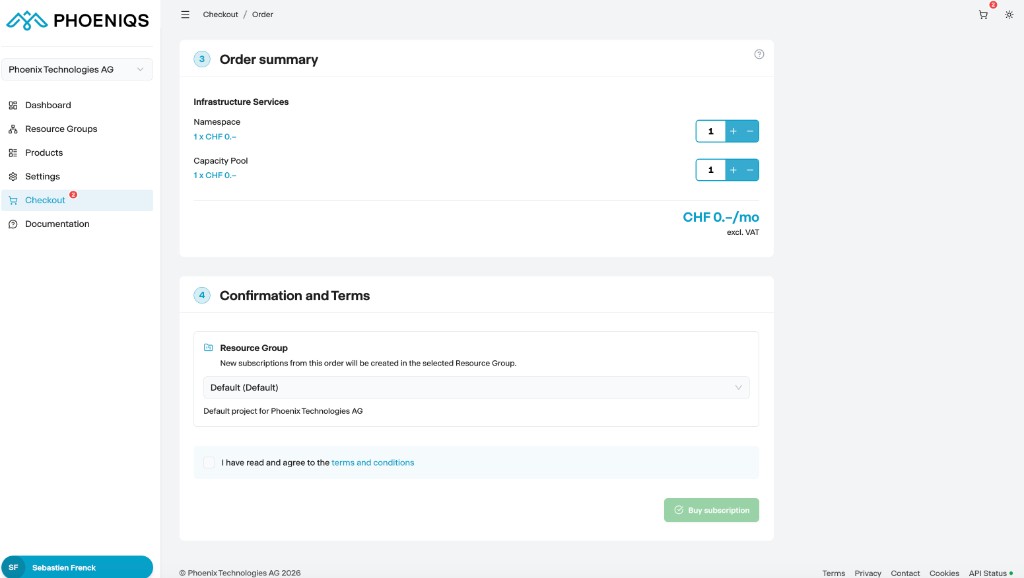
A Capacity Pool is free to add. It doesn't do anything on its own, it's the container that the paid resources below get assigned to.
#
Step 3: Purchase Resources
With a Capacity Pool in your Resource Group, purchase the compute resources it needs from Products → Infrastructure Services:
- Go to Products → Infrastructure Services.
- Click Add on each resource tile you need.
- At checkout, select your Resource Group and complete the purchase.
You can add multiple tiles to your cart before checking out. See Resource Pricing for exact rates and a worked cost example.
#
Step 4: Choose Namespace or Hosted Cluster
Once the pool has resources, decide how you want to consume them. This is the one branching decision in the purchase flow:
#
Option A: Add a Namespace
- Go to Products → Infrastructure Services.
- Click Add on the Namespace tile.
- At checkout, select your Resource Group and complete the purchase.
#
Option B: Provision a Hosted Cluster
A Hosted Cluster can only be provisioned after its Capacity Pool and all required resources (compute, memory, storage) are already purchased, since it draws from that pool. Minimum sizing: 50 GB root volume per worker, 10 GB etcd storage per member (3 members). See Hosted Cluster for full sizing guidance.
- Go to Products → Infrastructure Services, click Add on the Hosted Cluster tile, and complete checkout with your Resource Group selected.
- Open the Hosted Cluster subscription in your Resource Group and fill in the release image, cores/memory per worker, number of workers, etcd storage, and root volume storage, then select the Capacity Pool to draw from.
- Click Provision. Clusters take about 10 minutes to become available and start on a 60-day self-support trial license.
#
After Purchase
- Namespace workloads: see Access Your OpenShift to log in and deploy your first workload.
- Hosted Cluster workloads: the portal's Configuration tab shows your admin credentials and Launch OpenShift Console link once provisioning completes.
#
Troubleshooting
#
Notes
tip Need help?
If you experience any issues or need assistance, please contact support.
#
Related Pages
- How Phoeniqs Cloud Works
- Resource Pricing
- Hosted Cluster
- Namespaces, Quotas and RBAC
- Access Your OpenShift
- IaaS FAQ